

Scheduling Clips in Brightcove Live
Scheduling a clip in the Control Room
- Open the Live module.
- Create a new Live event with a Static Entry Point or visit a previously created one.
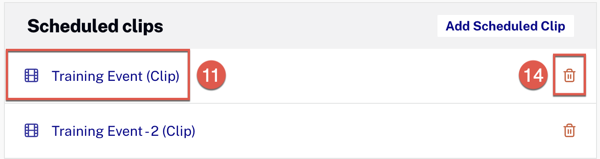
- In the Control Room, scroll down to the Scheduled clips section.
- Click Add Scheduled Clip to schedule a new clip.

- A modal window will appear. Select the Start Date and Time and the End Date and Time
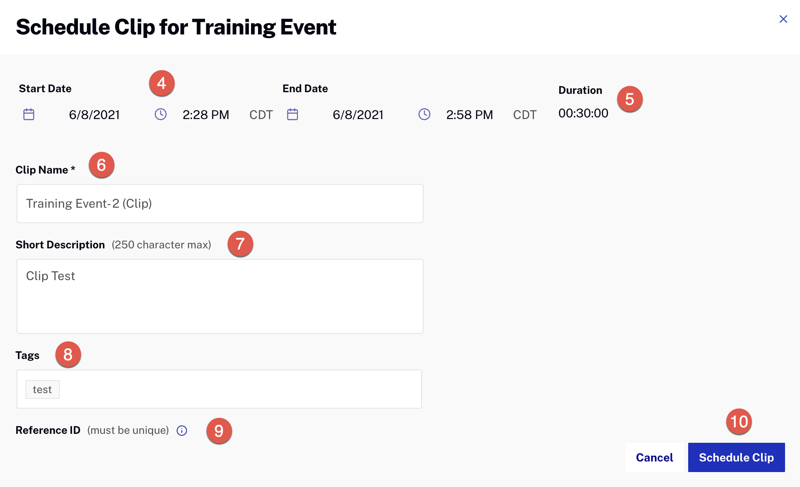
- The Duration of the clip is automatically calculated.
- Give it a Name.
- Write a Short Description. (Optional)
- Assign Tags if necessary. (Optional)
- Add a Reference ID. The ID must be a unique value for the entire Studio account. (Optional)
- Click Schedule Clip.
- To update a scheduled clip, click on the clip.
- Make the desired changes.
- Click Update Clip.
- To delete a scheduled clip, click the trash can icon.
Scheduling a clip in the clipping page
- In the Control Room, click Create Clip from the left menu.
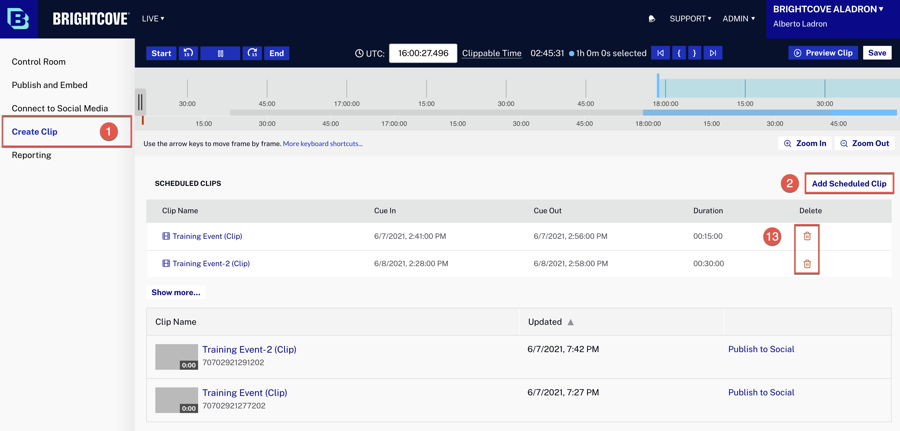
- Click Add Scheduled Clip to schedule a new clip.
- A modal window will appear. Select the Start Date and Time and the End Date and Time
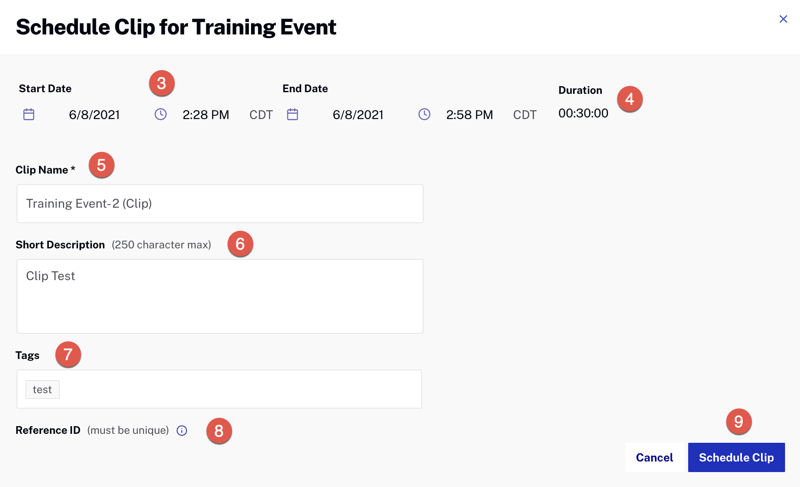
- The Duration of the clip is automatically calculated.
- Give it a Name.
- Write a Short Description. (Optional)
- Assign Tags if necessary. (Optional)
- Add a Reference ID. The ID must be a unique value for the entire Studio account. (Optional)
- Click Schedule Clip.
- To update a scheduled clip, click on the clip.

- Make the desired changes.
- Click Update Clip.
- To delete a scheduled clip, click the trash can icon.